I had this sheet of die cut paper by Making Memories. I really wanted to make use of the stamp cut border as it went with my postal theme, but I didn’t want to lose the center of the paper by covering it up with what else I had planned for my layout. I cut out the center of my patterned paper so that I just had the die cut stamp border. I used the center piece I cut out to mat my photos, and I cut out the little flowery vines.
I placed a piece of vellum that I never thought I’d use in the center of the frame and I then used a plain piece of kraft colored cardstock which I tore the edges of. The torn edges of that cardstock were to become one of my handmade embellishments, although I didn’t know it at the time. As I played around with my scrap strips of paper I thought they sort of looked like rosebuds if I rolled them up and then squashed them. Add some ink, paint, and stickles and I’ve got pretty cool embellishments out of something I’d normally throw away!
Next I chose to use an envelope on my layout which was very much on the cheap since who doesn’t have one of those on hand! To make my own wax seal, I melted a piece of crayon with my embossing gun and then immediately pressed a metal embellishment into the wax. I don’t know why I had these metal embellishments. I don’t really like to use them since they can be rather heavy, but this was a great way to get some use out of them! After the wax had cooled, I put a bit of paint on my seal and then wiped it off and I was left with just paint in the crevices to add extra definition.
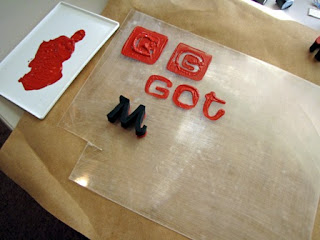
The last technique I’d like to share is one that’s lots of fun. If you have kids you might have some of this product lying around. Do you have a set of alphabet stamps that you love, but always find they are too big to use on your layouts? I sure do! So what do you do? You shrink ‘em!!! I had fun playing with some shrinky- dink paper. You must first make sure to sand your shrink paper in order to give it some tooth for your paint or ink to adhere. I took some foam stamps and dipped them in acrylic paint, let them dry, and then cut them out. Next you can either shrink them with your embossing gun (I tried this and had troubles with them blowing away on me) or use your oven. If you place them in the oven, here’s a tip: place a piece of parchment paper over the top while they shrink. This keeps them from curling up and sticking to themselves. As you can see in my photos, my letters shrank quite a bit and became the perfect size for my layout and they lent a cool 3D effect. While I was at it, I also cut out a frame with my Sizzix and shrank that to make a neat clear button to tie onto my envelope.


I had all but forgotten about shrinky dinks! Thanks for reminding me of how useful they can be :) The squashed roses are quite clever... your brain amazes me!
ReplyDeleteAmazing!!! I love what you did with that LO Carole! WOW!
ReplyDelete