Sometimes I like to take a break from creating layouts and do something different like an altered project. Recently I've been wanting to get back into reading. I use to be able to tear through a novel in just a couple days, it was something I really enjoyed, but for some reason (maybe due to parenting and being consumed with everything crafty) I've let that joy slide out of my life. So to get me in the mood to pick up a book I decided I'd make myself a cute little bookmark. I used some Jillibean Soup and Pink Paislee patterned paper, Core'dinations cardstock, Paper Trunk alpha stickers, a Pink Paislee brad, an eyelet and some ribbon. You'll also need some paint, plain chipboard, an xacto knife, and some strong glue like Helmar's 450 Quick Dry Adhesive.
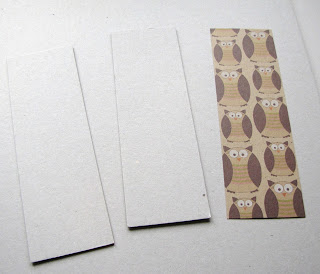
First, cut two pieces of your chipboard the same size. I made mine 2"x6" and also cut a strip of patterned paper the same size.
Next, cut circle out of the center of your patterned paper. Allign it over one of your chipboard pieces and trace the circle with a pencil. Then using an xacto knife, cut out circle from the chipboard.
Cut a circle of coordinating patterned paper and glue it to the bottom piece of chipboard. Glue your other piece of patterned paper to the top piece of chipboard (the one with the hole you just cut out) Use a glue like Helmar's Quick Dry Adhesive. It has a super strong bond and drys fast so you can keep working! Now you can glue your two sides of chipboard together to form a double layered bookmark. This will give you some extra dimension as you'll see in a moment.
The next step I took was to cover the backside of my bookmark. I had a scrap of core'dinations cardstock that I had already embossed and sanded. I had it lying around from a previous project and wanted to use it except it wasn't the color I wanted. So I pulled out some paint and changed my paper to a green I liked. I also discovered a new tip and use for your old dryer sheets. They make great throw away painting tools. It's super easy and almost like a dry brush technique. All you do is wad up your dryer sheet, dip it in the paint, and then rub it on and voila you have a custom colored accent or cardstock! So from now on I have a jar that I'm statshing all my used dryer sheets in. They make for great cleanup and fast work!
Okay, now flip your bookmark over and use some of the same paint to dry brush around the circle to give your design a punch of color. Because there are two layers of chipboard here, it gives you some extra dimension making the circle reset a bit. When the paint is dry you can add your alpha sticers. I used Paper Trunk's "Benny" alphas. For a little fun element I used a brad from Pink Paislee to replace the "o" in the word "spot". I didn't want the prongs to show on the back of my bookmark, so I snipped them off and used my Helmar 450 Quick Dry again to glue down my brad.
Next, I cut out this cute little owl and used a Helmar Zapdot on the back to give it a little lift as it sat in the recessed circle of the bookmark.
Then I just finished it all off with an eyelet punched and set at the top and a ribbon tied on. I also used one of Jillibean Soup's corrugated letters to add my initial on the back with a touch of matching green paint.


Great tutorial!! And the bookmark looks amazing i love the effect the stamping gave!!
ReplyDeleteGreat tutorial and fab bookmark :)
ReplyDeleteDarling bookmark and excellent tutorial! I love the tip about recycling our used dryer sheets - awesome! (btw I have finally figured out how to work half an hour of reading into my day - I read while I'm on the treadmill or elliptical! It actually makes that dreaded task - working out - something to look forward to!)
ReplyDeletesuper cute and great tutorial!!!
ReplyDelete